If your goal this year is to spark your child’s interest in gardening, there’s no need to wait until spring. There are plenty of child-friendly plant activities you and your family can do indoors during these cold, rainy winter days. Here are three of our favourite fun and educational indoor plant activities for you and your kids to do together this winter!

PHOTO CREDIT: happyhooligans.ca
1. Design and Make a Paper Plate Garden
Designing your dream garden on a paper plate is a great indoor activity that’s fun for the whole family! It’s also a great opportunity to teach your kids some gardening basics. Consider discussing which types of plants are best planted together, or the important role pollinators play in the garden.
Instructions:
- Gather some illustrated gardening books or botanical sketches from the internet for inspiration and reference.
- Pick up some paper plates, garden material like dirt, sand, bark, or mulch, colourful felt, construction paper, scissors, popsicle sticks, pipe cleaners, paper plates, glue, and other art supplies to help your gardens really pop!
- Using your references, trace plant shapes out onto the felt and paper with pencils or markers before cutting them out. Assemble your plants by gluing the shapes onto your popsicle stick or pipe cleaner “stems” and adding any extra accessories and personal touches (leaves, glitter, etc.)
- Spread glue onto your paper plate and add your garden materials to create a realistic backdrop.
- Arrange your garden’s elements on the backdrop before gluing them down on the paper plate.
- Finish your plant displays by adding some final, personal touches, like birds, insects, and other animal friends! This activity’s meant to channel your child’s creativity, so give them a chance to let their inner gardener shine through!

2. Start an Indoor Herb Garden
Winter is soup and stew season, making it the perfect time to start an indoor culinary herb garden. This activity is a great way to introduce your children to gardening by walking them through the herb planting and growing process. It’s also a great way to get them excited about helping out in the kitchen. After all, nothing beats cooking with your own fresh-grown ingredients!
Instructions:
- Take a trip to your local garden centre and pick up a bag of potting soil and some potted herbs or seeds of your choice.
- Save some empty yogurt containers and make drainage holes at the bottom. Alternatively, you can also pick up some tiny pots during your trip to the garden centre.
- Optional: Decorate your pots or containers using paint, stickers, and other decorative items. If you paint your containers, allow them to dry before planting.
- Plant your potted herbs indoors and give them a thorough watering. If you’re using seeds, follow the package instructions to ensure they receive the necessary germination conditions.
- Place your planted herbs indoors near a window that gets as much light as possible—preferably at least 6 hours a day—or put them under grow lights.

3. Make Tie-Dye Shirts With DIY Natural Dyes
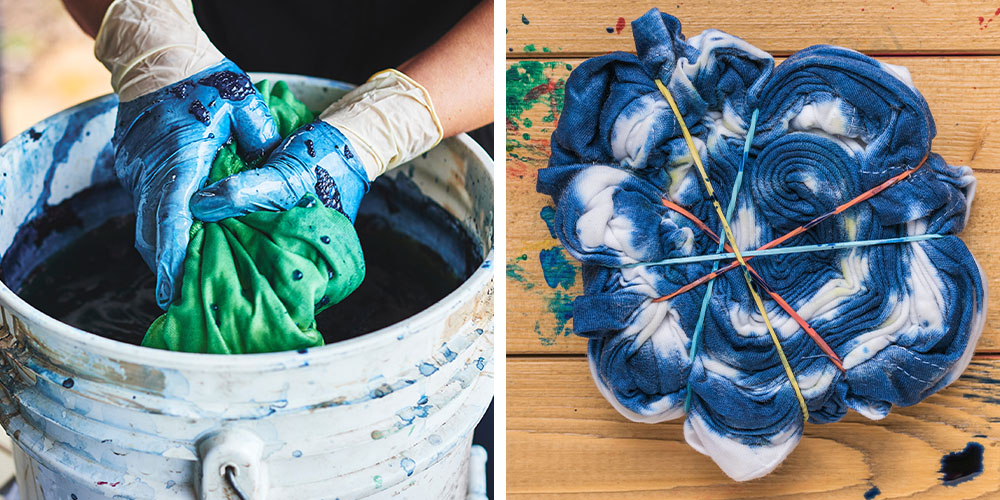
This winter is the perfect time to get nostalgic and make some old-school tie-dye t-shirts indoors with your kids! The only difference is, instead of a traditional tie-dye kit, the funky designs on these shirts come from all-natural DIY dyes! Using plant-based dyes isn’t just better for the environment; it also teaches your children to appreciate the natural world’s hidden beauty and utility.
Instructions:
- Buy or find some plain white t-shirts. Natural fabrics such as cotton work best.
- Choose the plants you’ll use to create your dyes. Some popular ideas include chopped beets for reds and pinks; ground turmeric for yellows and oranges; ground coffee for browns; chopped spinach for greens; and sliced purple cabbage, blueberries, or blackberries for blues and indigos.
- Prepare your dyes by adding your bases to saucepans along with two tablespoons of salt and enough water to cover. Simmer over medium heat for an hour.
- Once your dyes have finished simmering, set them aside to cool before straining them into resealable jars or containers using cheesecloth, coffee filters, or fabric scraps.
- Prepare your shirts for dyeing by simmering them in a pot for an hour with either a 1/2 cup of salt to 8 cups water (best for fruit and berry-based dyes) or equal parts water and white vinegar (best for plant and vegetable-based dyes). When done, drain and thoroughly rinse the shirts under cold, running water.
- Lay out newspapers or old rags to protect your indoor work surface.
- Create patterns for your tie-dye shirts by either laying them flat on your work surface and twisting the middle or rolling them into tubes. Secure your shirts with elastic bands ahead of dyeing.
- Place your rolled-up shirts into steel bowls and pour your plant-based dyes over top of them. Allow the dyes to soak in for at least 24 hours.
- Keep in mind that some plants stain better than others and that plant-based dyes often fade quickly from repeated washing or exposure to sunlight.
These indoor crafts are sure to get your kids as excited about the upcoming growing season as you are! If you’re looking for more indoor plant activities for BC winters, or you’re in search of inspiration for spring, stop by and visit us at Mother Nature Garden Centre in Powell River, BC, today!